Ok so we already uploaded this file to Facebook, however Mike commented that the eyes at the start of the animation were too stand out, and needed brought down in brightness.
We tried to lower this down but given the limited amount of time and different work flows in different team members we decided to work with what we could in After Effects. Below is the finalised version.
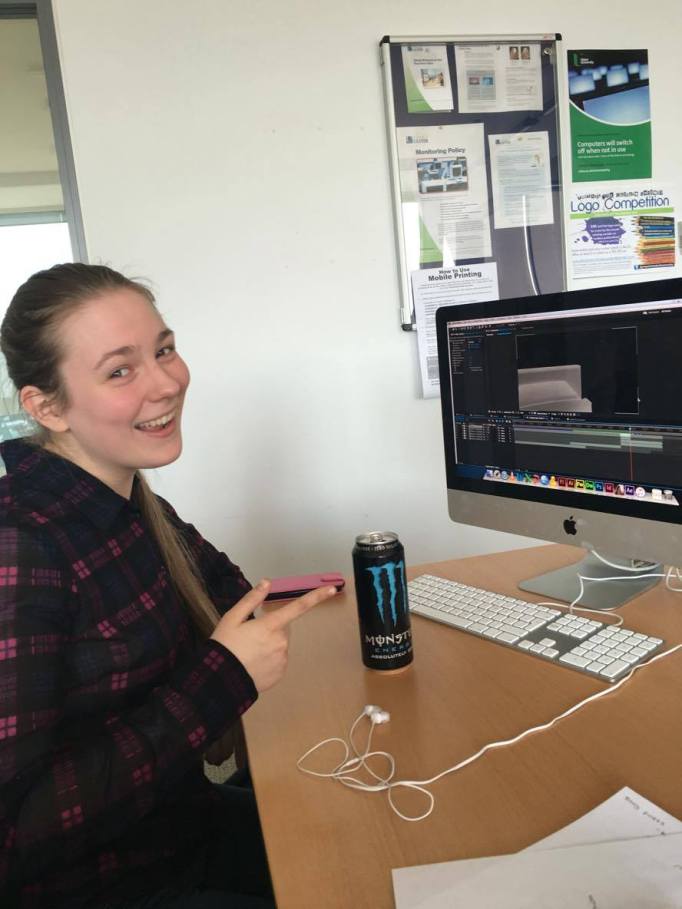
Lorna and I tag teamed with editing. Well I say tag teamed, I mean she did the editing and I helped with moral support and timings. Also I was the voice of questioning when mailing Conánn with problems.
We encountered some problems during editing, but were able to fix them quickly.
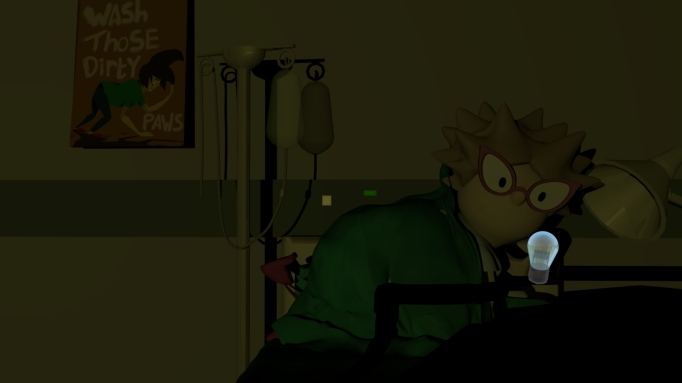
The glow on the lightbulb in the final scene had a dark halo around it. Conánn suggested we look into the blending modes to fix this. We sat and played around with the settings. The halo is still there but definitely not as noticeable.
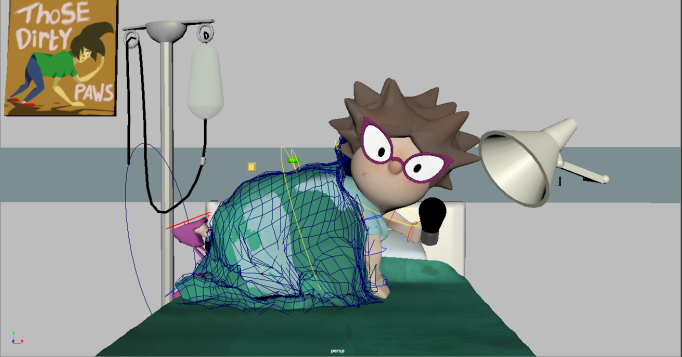
The curtain hadn’t rendered properly the first time with the correct camera and the ambient occlusion would not work. I had to redo part of the geometry (the railing) to fix this.
Scene three needed re-rendered for the bed climb to add the ambient occlusion to show she has touched the bed frame.
We realised we had to add a few extra sounds, the bed spring effect (note to self never google bed spring sounds) and the metallic swing noise from the lamp.
Scene one was quite dark when rendered but we were able to adjust the contrast and brightness levels to account for this.
We had to re record the final line for the nurse- going back to our old Monty Python research, we wanted to end on a pun. The line “this is shocking” was our chosen one.
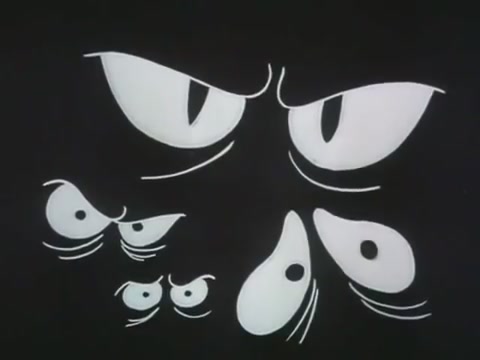
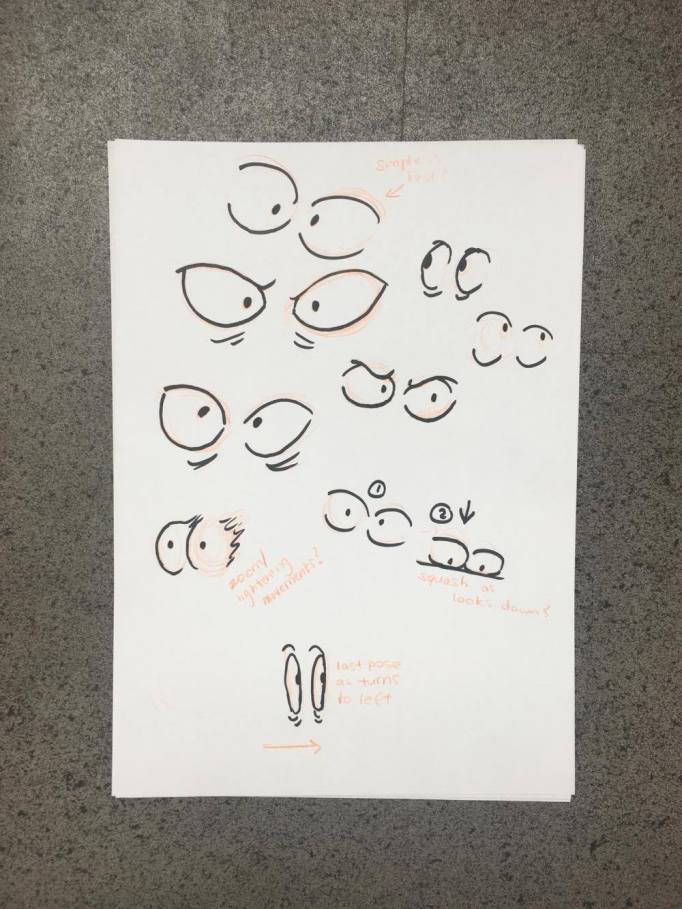
One of the comments made by Conánn and Alec was to make the eyes more prominent and have more movement when they search in the dark. It was suggested that this could be done in photoshop.
Originally we assigned the task to Jordan to complete, however due to irregularities in his files, it was decided that I just create them, to match how it was imagined.
I opened up some of my original research, looking into the opening credits from Trap Door (1984) and the eyes from Scooby Doo (1969-1970) and The Little Mermaid (1989).
Trap Door introduction. I really liked the addition of the squash and stretch to make it seem like the eyes were their own character. This wasn’t suitable to do in our own footage, however, it is something that could be experimented with after the deadline (?) with a simplified character.
The eyes from Scooby Doo. It will be interesting for me to experiment with the linage under the eyes. Our character doesn’t have lids to create this look but i wanted to try and (Vignette4.wikia.nocookie.net, 2016)
Although not strictly black and white, the personality of the eels is reflected well in their eyes.
I tried to imitate these styles to to play with the look. Although I love Scooby Doo style eyes
My Own Eyes
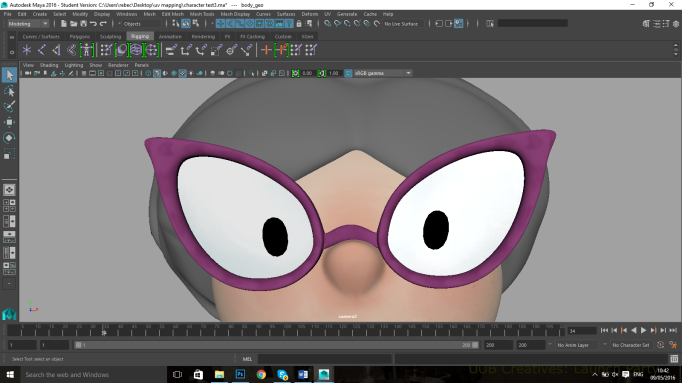
To keep the glasses shape consistent I used a screen shot of the character from the original model and then lassoed around the lens.
I cleaned it up, neatening the edges, keeping the each lens and each pupil on separate layers. This made it easier to position on the timeline. I tried to use Jordan’s original eye creations to make it easier to plot the movements.
This module has been a tricky one for me as it is there were times when I really struggled and times when I felt more comfortable with modelling.
For Floating City I was very unsure about modelling, especially with the more organic bone structure we created. Looking back, I probably should have looked at z-brush to create a more bone look to the world- to create one closer to our designs. We also were very rushed in this project, due to the intense New Narrative’s Vogler project running at the same time (worth the same amount of points). I found the research in this project very interesting and glad it was changed to Rome, rather than Belfast. It allowed for a bit more cultural understanding and a totally different outlook on which things would influence the world itself (the culture, architecture, religion etc). This project allowed for us to go a bit insane too, allowing for me to introduce some of my own science research into the creation of energy in the body and how this could be applied in our world itself. If I was to go back and redo this project I would familiarise myself with lighting a bit better as the final outcome was definitely not what was anticipated in how it was show to the audience.
The head model, for me, was very enjoyable and something I would definitely try again, with other people as references, to see how different face shapes effect the topology and the skin folds. It taught me a lot of simple modelling techniques and how in animation a lot of the topology is created with science in mind- in this case, following the facial muscles. I found it a lot to match my face with the correct topology that create the floating city, which is strange as one is a lot more complicated. I found the research for this model very interesting as well- looking into some of the face models with such high detail and good shape with very little topology or being low poly. I tried to follow this in my own face. Modelling the head also allowed me to have a bit more confidence in the modelling itself. Areas like the neck where my tutorials did not cover I found myself having to improvise and create my own model based on several topology flows I had found online.
Re-rendering the floating city as a still to show the size. We sadly didn’t have time to re-film the world like we had intended, maybe this could be a summer project for myself.
To lead on from the execution scene, we decided to alter the character’s look to fit with this post electrocution look.
We only wanted to change a few elements though, due to limited time with editing and corrections so we agreed on the following;
Mad static like hair.
The hair itself contains positively charged ions due to their amino acid structure. The electric current contains negatively charged ions, attracting the positive proteins in the hair, causing them to stand up. What I remembered quite vividly was that from Home Alone 2: Lost in New York (1992) when Marv is electrocuted.
Both the skeleton and hair principles combined. Home Alone 2: Lost in New York (1992). (YouTube, 2016).
Below is the hair I created, inspired by those I had looked into. Although our hair isn’t modelled in the same way as in our references (individual strands) I did my best to work with what I had and create this static look. Although, it was commented, she does look like Sonic the Hedgehog.
2. Burn/ singe marks on the skin
When looking into some cartoon references for this scene, we realised that the skin was normally ashened or had a smoke like look to the flesh.
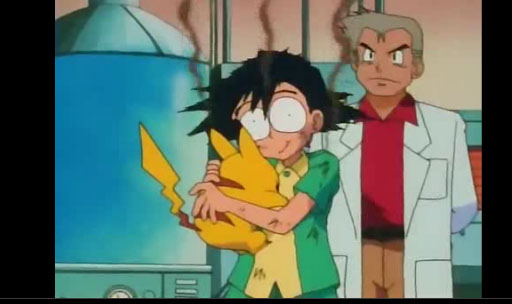
After Pikatu has electrocuted Ash in an old episode of the show Pokemon. I liked the minimal marks shown on the character, however it was obvious they had been electrocuted. The smoke is definitely something we hope to do by the end of the project, in After Effects.
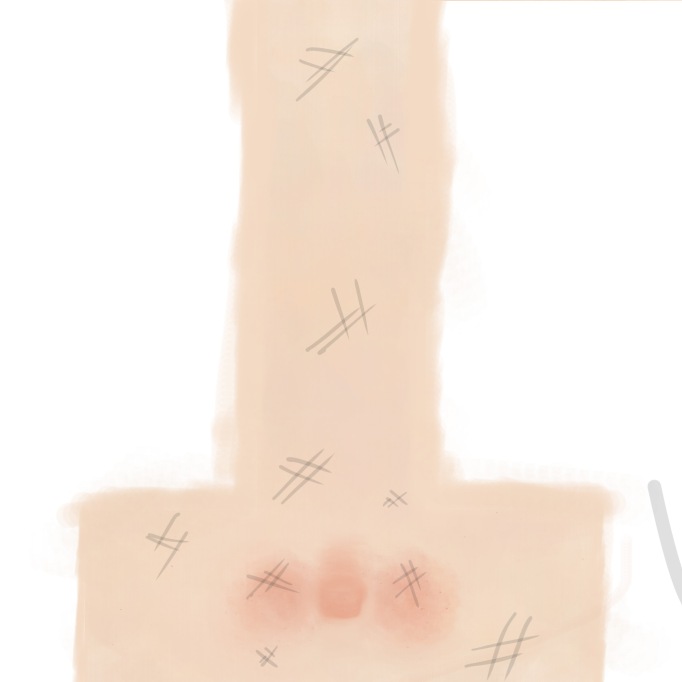
Below is the map I created for the character. I realised that after creating the lines on the face that the glasses cover a significant area.
3. Smoke from the head
Another thing we wanted to include was the use of smoke appearing above the head after our character is electrocuted, as if she is still smouldering. Lorna has informed me this is something that can be done in post production in After Effects. The best example I could find of this to shown Lorna how it would be styled was the old Road Runner (1931) cartoons. Wile E. Coyote often is blown up in his many attempts to catch the Road Runner.
I forgot how good old school cartoon violence is. (YouTube, 2016).
Update 08/05/16– we decided to leave out the skeleton in the arm during editing as we realised that it was too much when we added the electric jolts through the arm itself. I think Lorna did a great job in creating this look, given that it was hard to outline the arm, as it was not rendered on a separate pass.
YouTube. (2016). Home Alone 2: Lost in New York (4/5) Movie CLIP – Marv Gets Electrocuted, Harry Blows Up (1992) HD. [online] Available at: https://www.youtube.com/watch?v=DTPq0mNS0-0 [Accessed 9 May 2016].
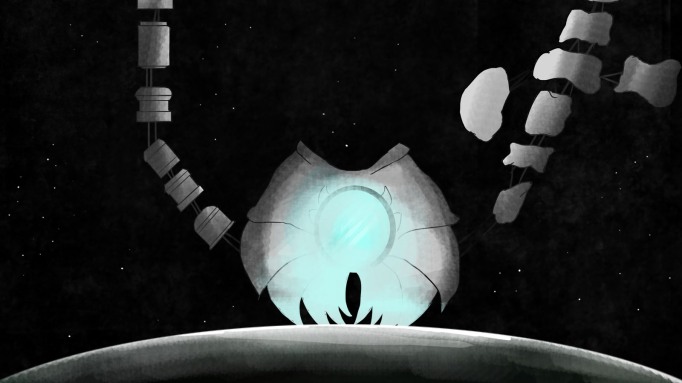
Ryan was the one responsible for the camera in our world, we roughly sketched how we wanted to world to look when rendered to show for size. We agreed with Conánn’s advice and wanted to use objects of a known size, put in our frame, to re iterate the size of our world.
I can’t draw light and this was a really quick paint to show what I meant to Ryan. I really was inspired by the framing of the ship by Kubrick in 2001 Space Odyssey (1968). We want the camera to remain in place, however, have the planet move upward, creating a halo of light on the destroyed Earth (the giant grey blob at the bottom of the shot).
This sums up the current feeling in our team. (Imgur, 2016).
I swear rendering hates us. When we rendered the final take for scene one (the intro pan) the camera had key framed in random places.
We literally had play blasted the scene right before rendering- I have no idea. It was an easy fix though and thankfully more computers had become available for rendering- so instead of 8 hours of rendering on one, it was split by 5 computers.
Going off of the feedback from our previous presentation, Conánn had said that a real old school comedic zap would look best- to emphasise she was getting shocked while unscrewing the bulb. We decided three things we wanted to include into the scene overall. On a more cinematic note- it kind of reminded me of the death by electric chair scenes from The Green Mile (1999).
A disturbing execution- death of Eduard Delacroix. The Green Mile (1999).
The death of the innocent. The Green Mile (1999).
The shaking of the hand, as scene in many cartoons- over exaggeration is key here.
Electroshock Therapy in the Simpson. (YouTube, 2016).
In this scene you can see the wavy like lines for the characters shape, expressing more movement than is just being done by the character.
Electrocution character test. (YouTube, 2016)
Although this character has more of a puppet feel and look to it, I think it shows the kind of uncontrollable movement that we can use in our own character.
2. The appearance of a skeleton
Ursula’s Death. (YouTube, 2016).
We would take the animation of the hand and have the skeleton follow the motion path and move accordingly, like in the scenes above. We would probably either have to black out the hand or darken it to create a similar look to that above.
3. Electrical current flowing through the hand (or some sort of lightning ‘zaps’ stemming from the hand down the arm .
Family Guy crow explosion. (YouTube, 2016).
This animation is a metaphor of how we all feel about the project now. Kind of.
Leon the Lion- Lightening Shock. (YouTube, 2016).
Thankfully, a lot, or nearly all, can be done in After Effects to cut on render time and messing about with unknown elements in Maya.
If you want to have a laugh while marking please watch this informative safety video. (YouTube, 2016).


 This sums up the current feeling in our team.