


This module has been a tricky one for me as it is there were times when I really struggled and times when I felt more comfortable with modelling.
For Floating City I was very unsure about modelling, especially with the more organic bone structure we created. Looking back, I probably should have looked at z-brush to create a more bone look to the world- to create one closer to our designs. We also were very rushed in this project, due to the intense New Narrative’s Vogler project running at the same time (worth the same amount of points). I found the research in this project very interesting and glad it was changed to Rome, rather than Belfast. It allowed for a bit more cultural understanding and a totally different outlook on which things would influence the world itself (the culture, architecture, religion etc). This project allowed for us to go a bit insane too, allowing for me to introduce some of my own science research into the creation of energy in the body and how this could be applied in our world itself. If I was to go back and redo this project I would familiarise myself with lighting a bit better as the final outcome was definitely not what was anticipated in how it was show to the audience.
The head model, for me, was very enjoyable and something I would definitely try again, with other people as references, to see how different face shapes effect the topology and the skin folds. It taught me a lot of simple modelling techniques and how in animation a lot of the topology is created with science in mind- in this case, following the facial muscles. I found it a lot to match my face with the correct topology that create the floating city, which is strange as one is a lot more complicated. I found the research for this model very interesting as well- looking into some of the face models with such high detail and good shape with very little topology or being low poly. I tried to follow this in my own face. Modelling the head also allowed me to have a bit more confidence in the modelling itself. Areas like the neck where my tutorials did not cover I found myself having to improvise and create my own model based on several topology flows I had found online.
Re-rendering the floating city as a still to show the size. We sadly didn’t have time to re-film the world like we had intended, maybe this could be a summer project for myself.
Ryan was the one responsible for the camera in our world, we roughly sketched how we wanted to world to look when rendered to show for size. We agreed with Conánn’s advice and wanted to use objects of a known size, put in our frame, to re iterate the size of our world.
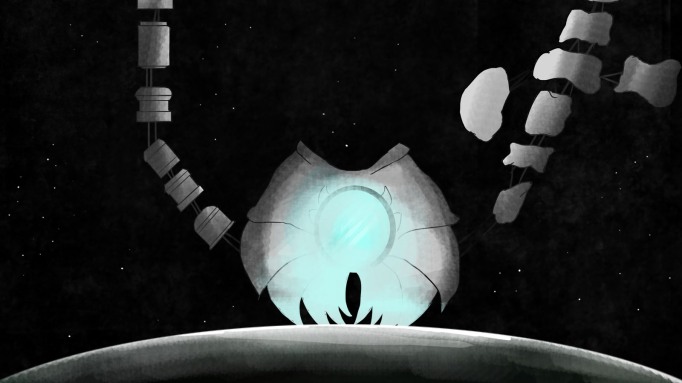
I can’t draw light and this was a really quick paint to show what I meant to Ryan. I really was inspired by the framing of the ship by Kubrick in 2001 Space Odyssey (1968). We want the camera to remain in place, however, have the planet move upward, creating a halo of light on the destroyed Earth (the giant grey blob at the bottom of the shot).
So, our first presentation for the city project went pretty well, however, Ryan, Eoin and I agreed that there were a few things we could change for our hand it.
Conánn said that our scale was off i.e.we did nothing to show the actual size of the world. He drew the following image to help us picture how we could demonstrate its size. He suggested that we place objects of familiar sizing, such as other planets, around the floating city.
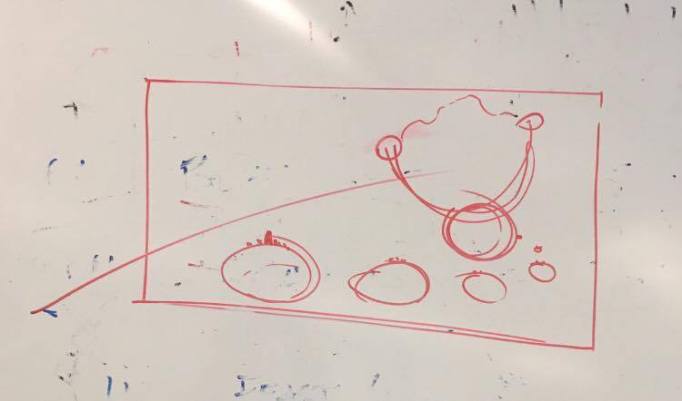
Conánn’s diagram to help explain things further.
We will do some more research in hope to improve when we film the world.
Our city. Yeah it’s a little bit dodgy.
When modelling the eye I wanted to add a level of realism to it. I know the human eye itself has a lot of layers to it- for the function of sight and stability. Although we are not marked on the modelling of the eye itself, I want to go back and make it more realistic, like that in the one Conánn modelled.
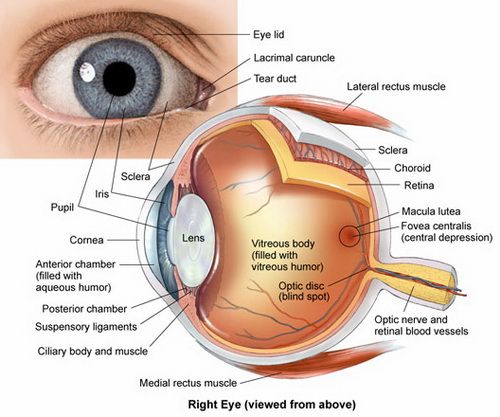 The eye diagram. (S-media-cache-ak0.pinimg.com, 2016).
In my own model, I didn’t include the extrusion of the cornea, maybe this is something I could do over the summer.
Below is the video I used to complete the eye model.
The eye tutorial. (YouTube, 2016).
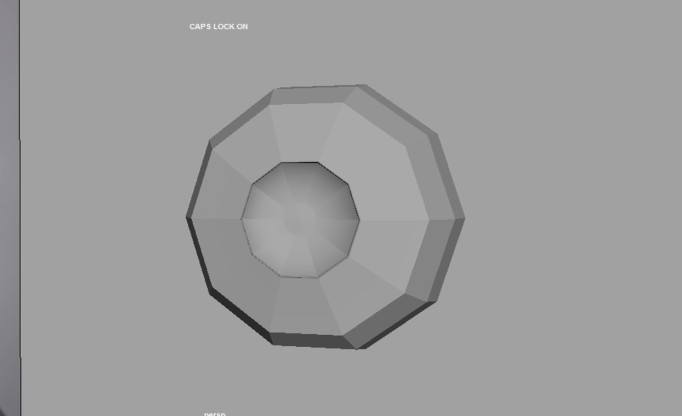 The wire un-smoothed eye.
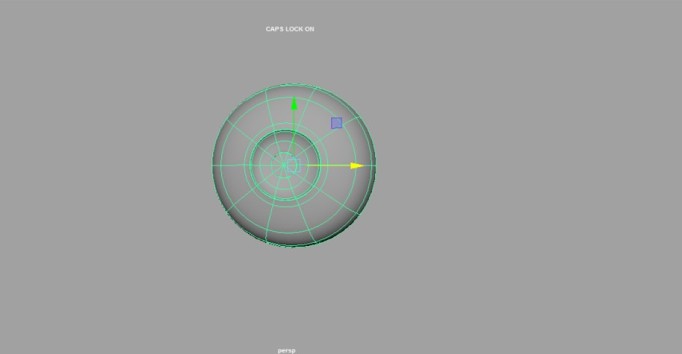 The eye model.
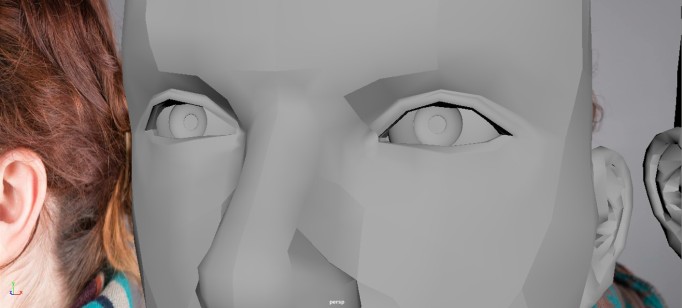 The eyes placed into the model itself.
References
S-media-cache-ak0.pinimg.com. (2016). [online] Available at: https://s-media-cache-ak0.pinimg.com/736x/a2/eb/42/a2eb42182e448038473975202c74de07.jpg [Accessed 28 Apr. 2016].
YouTube. (2016). Eye modeling Texture Like Pixar And Dreamwork Autodesk Maya. [online] Available at: https://www.youtube.com/watch?v=pY0yyGsGmzY [Accessed 28 Apr. 2016].
I tried to move my Maya file onto another computer (one of our Macs) and this happened. On one hand, I made beautiful abstract art work. On the other- what the heck.
 I see General Grievous, a butterfly or an elephant with huge ears.
The neck was a bit of a stumbling block for me- simply the tutorial did not cover it.
That, and my original reference photos showed I had no neck (I stupidly wore a scarf which covered my neck completely).
I took the below photos to help look at my neck when modelling it. They made me realise how much of a scrawny neck I actually have.


When looking into the actual topology of the neck I found the reference below very helpful. I noted the pole under the neck, like I would expect to be, where the jawline meets the neck, where the masseter muscle meets the splenius and thyrohyoid muscles.
The Head by By Germán Zambrano Córdoba. (3dtotal.com, 2016).
Some of the muscles in the neck helped me to understand the topology and the flow of the neckline itself.
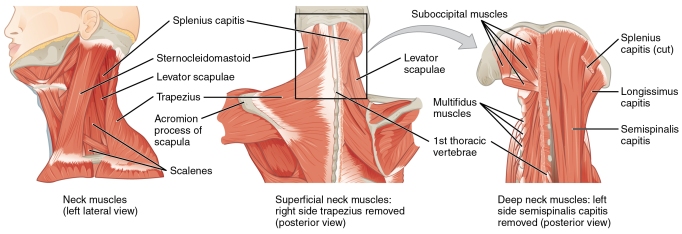
Muscles in the Neck. (Philschatz.com, 2016).
References
3dtotal.com. (2016). // Create stylized character scenes by Germán Zamorano Córdoba (page 1 of 2) / 3ds Max Photoshop ZBrush Digital Painting Project Overview tutorial from 3dtotal.com. [online] Available at: http://www.3dtotal.com/tutorial/2029-create-stylized-character-scenes-3ds-max-photoshop-zbrush-by-germn-zamorano-crdoba-motorbike-gas-station-cartoon [Accessed 28 Apr. 2016].
Philschatz.com. (2016). [online] Available at: http://philschatz.com/anatomy-book/resources/1111_Posterior_and_Side_Views_of_the_Neck.jpg [Accessed 28 Apr. 2016].
From the feedback for our world, it was mentioned that we had no representation of scale. We decided it would be best to re-film our world to make it look a lot more believable.
I also mentioned the idea of adding lighting to make it look more light a light-house effect. This effect would look amazing, especially as the world turned towards the camera, momentarily blinding the viewer. This technique has been used in several movies before;
The Lovely Bones.
The Lonely Bones lighthouse scene. (The Lonely Bones, 2009).
I love the progression in lighting from the lighthouse to the street light is incredible. The blinding light changing the scene from the previous to this one.
The Great Gatsby.
The beginning and end scenes from The Great Gatsby. (The Great Gatsby, 2013).
Another movie I have a soft spot for. The cyclical structure of the green light, a symbol for Daisy. The opening lighting scene, though from far away, gives an amazing atmospheric feel, giving the idea of importance in the light.
I love the opening book scene- could this be something we could experiment with? Maybe the project name on a classified file blending into our own scene.
Hot Fuzz.
The lighting cues from Hot Fuzz. (Hot Fuzz, 2007).
Another reference, prominent on my blog, is the Hot Fuzz movie. The lighting cue as the spotlight reflects on the nerd’s glasses is reminiscent of a Police spotlight.
This would look quite nice in our own project- I had previously mentioned the use of the a search light, possibly looking at the destroyed world below.
A brief sketch idea (at Ryan Beatty’s request).
References
The Lovely Bones (2009). Directed by Peter Jackson [FILM] USA: Orion Pictures.
Hot Fuzz (2007). Directed by Edgar Wright and Simon Pegg [FILM] USA : Studio Canal.
The Great Gatsby (2013). Directed by Laz Luhrmann [FILM] USA: Warner Bros. Pictures
The tutorials I used for modelling the head were Duylinh Nguyen. I found them very easy to follow and easy to adapt the topology to fit with my own features (such as reducing the height at which the ear is modeled.
The tutorials I followed. (YouTube, 2016).
My Process (in photos- when I remembered to take them..)
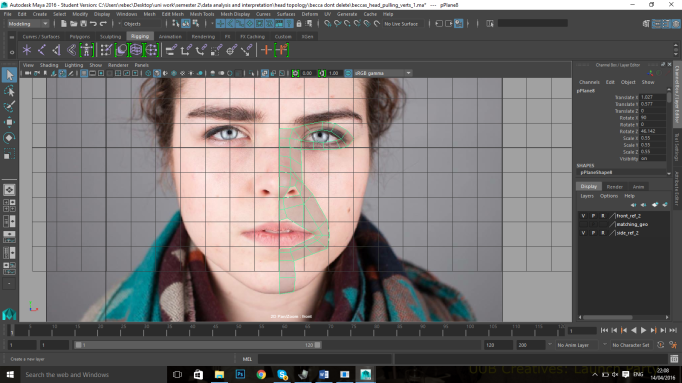
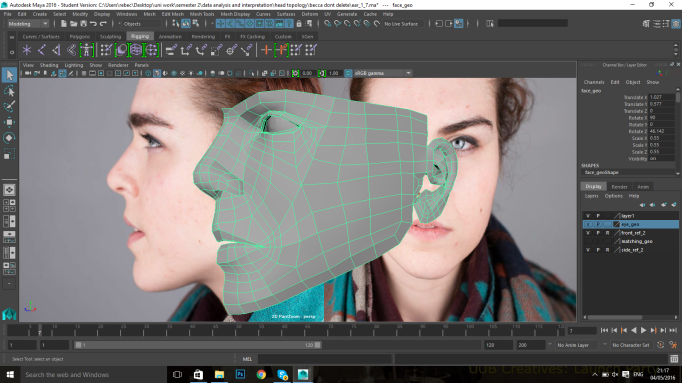
Step one- blocking the face as a plane. I had to form the basic outline for the front of the face, starting with a plane on the eye and then forming the ring structure. I then had to form the shape of the nose and mouth. It is clear to see that even in these early stages, there is some form to the face in the way the edges flow.
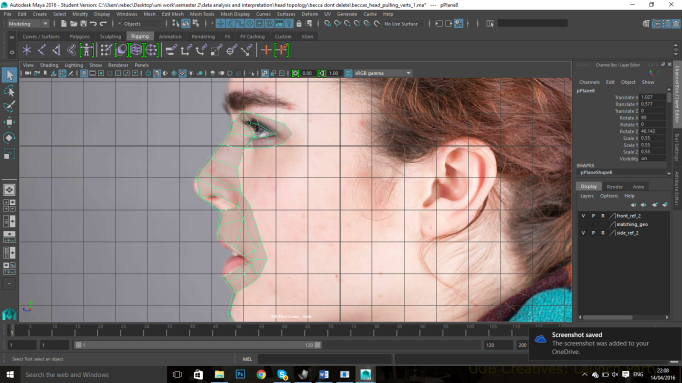
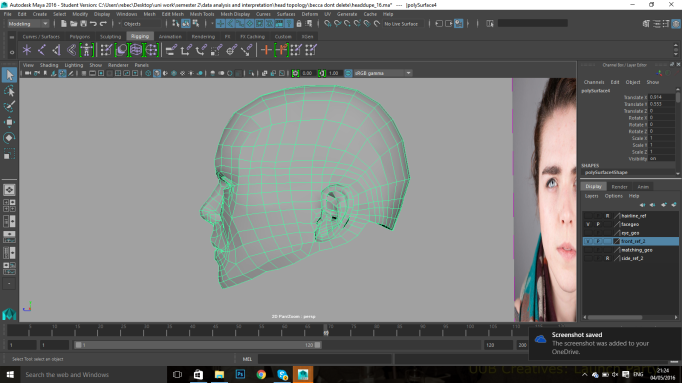
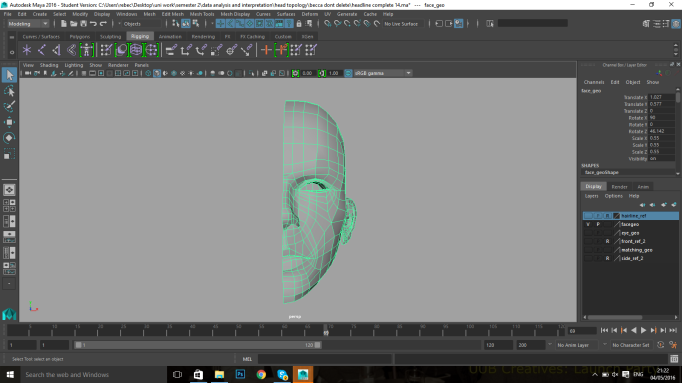
Step two- matching the vertices to the side view. I then had to work with the formed topology and pull the vertices to fit the side view. This was quite difficult for me, and took a few goes, but I got there eventually.
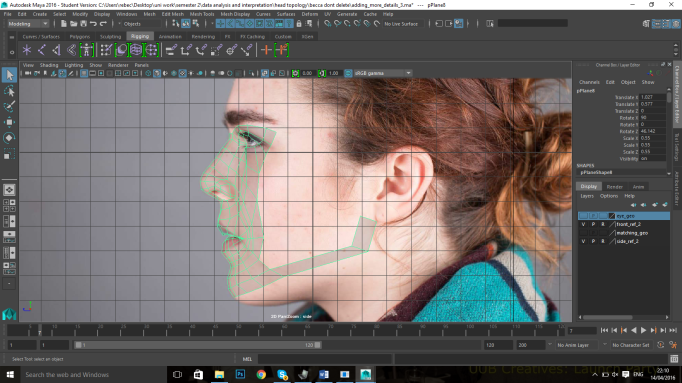
Step three- blocking the chin. The next step was to form the shape of the chin and begin to block out the the side of the face, placing the topology in a way to make it easy for me to match with the ear when I reached that stage.
Step four- adding more detailing in the mouth and nose. In this step I also started to block out the cheek area and side of the face.
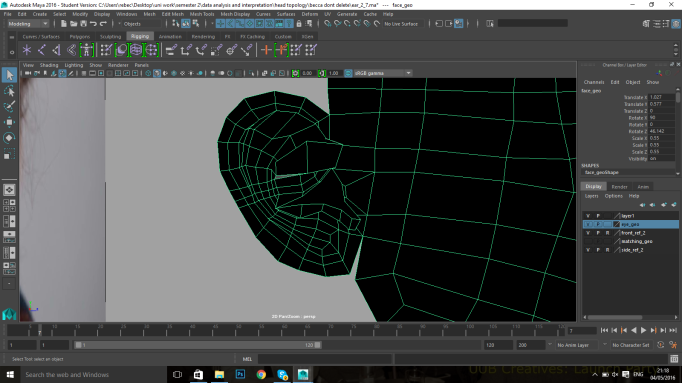
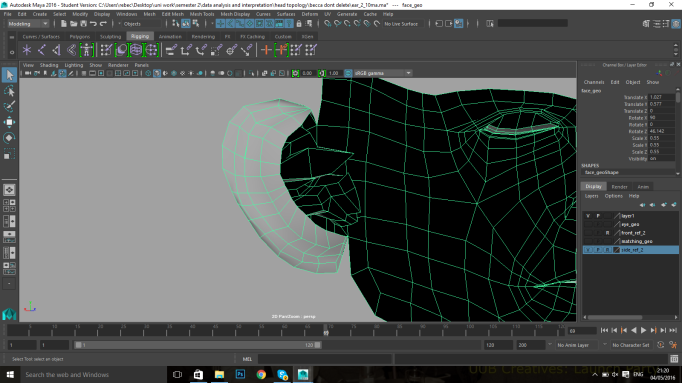
Step 5- The ear. I started by mapping out the ear with rough topology in a flat plane and then started to extrude the geometry to create the wrinkles in the cartilage. The tutorial I watched offered a few ways in creating the topology on the lobe, however I went with the one shown as it was a lot neater and created no triangles.
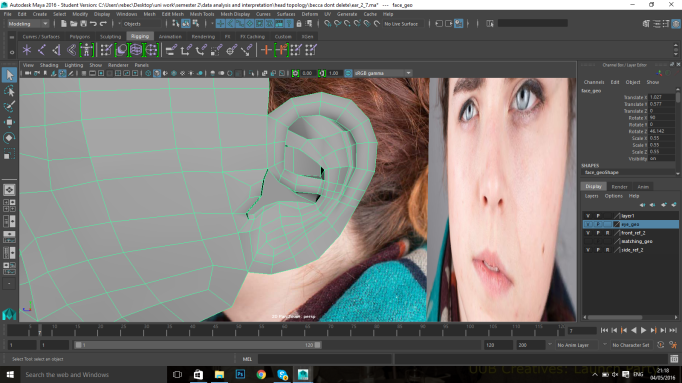
Step 6- Closing up the ear (above three photos). This was the hardest part for me as I originally merged two points to the wrong place, creating an N-gon. Thankfully, I had saved not long before and was able to pick up from the place again,
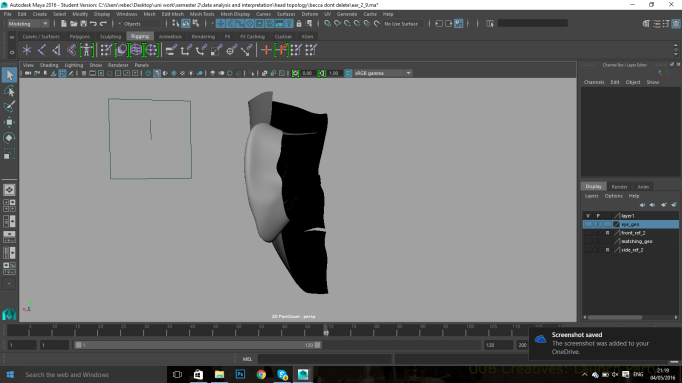
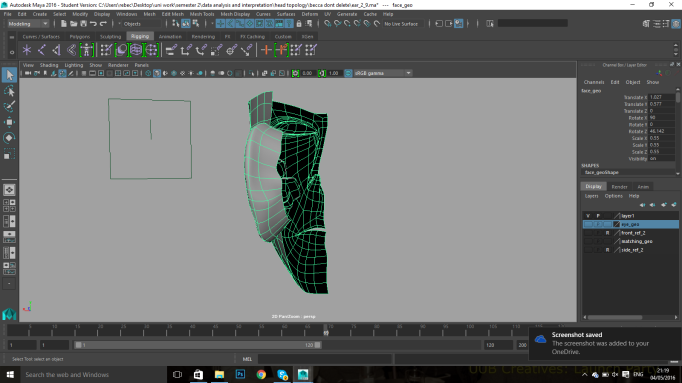
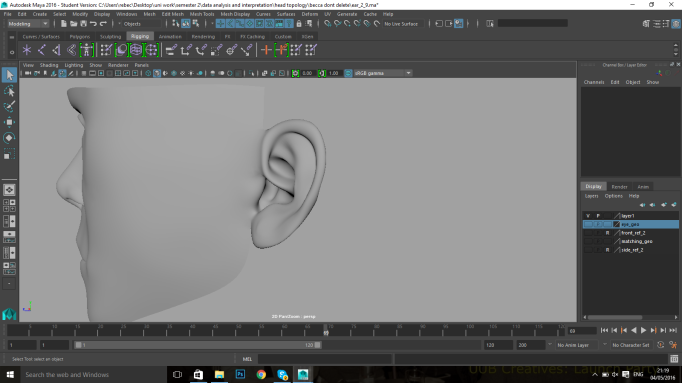
Step 6- Attaching the ear to the head geometry. This was the bit of the model that I enjoyed the most as it didn’t require a lot of fiddling. This was because my ear was already attached and didn’t need me to do much work to fix it. The flow of my head matched pretty well and I was able to pull the last inner edges of the ear back with ease.
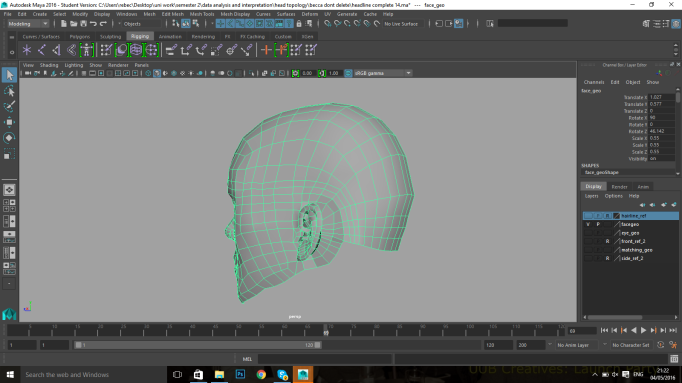
Step 7- The back of the head. This required me to get inventive and feel my head a lot to understand its overall shape. I then drew over my reference photo as a guide when creating the final thing. 
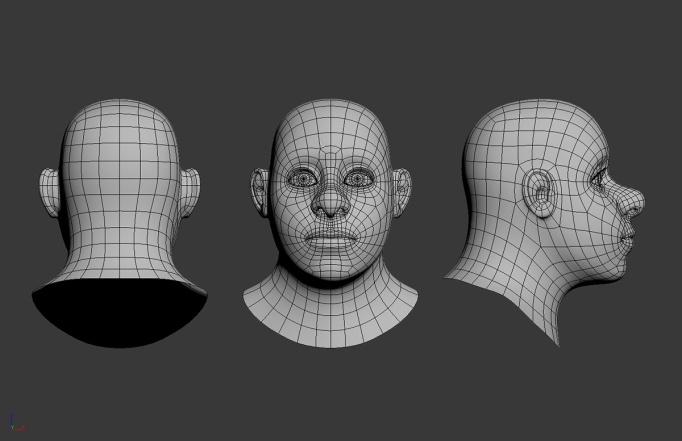
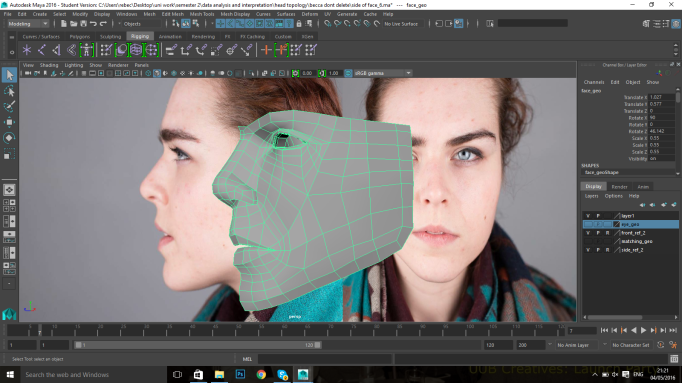
Step 7- Duplication. I then duplicated the geometry and tweaked the RHS to match my face. I also pulled the ears back more, as I though they were sticking out a little too much.
References
YouTube. (2016). Duylinh Nguyen. [online] Available at: https://www.youtube.com/channel/UCTU-FQtFbqjCqI6giU_uA-w [Accessed 14 Apr. 2016].
